Duck Confit

Posted in duck, entrée, french fries, slow cooking on 19 November 2009 by restaurant refugee

There is a very short list of culinary things more satisfying than duck confit.  And when I say very short list, I mean I can’t think of anything but I am allowing for the possibility.  It is “low and slow” at its finest and the kind of dish that people believe to be far more difficult than it actually is.  Sadly, most grocery stores no longer carry duck on a regular basis (and almost never carry just the legs) so you need to contact you local butcher or specialty shop.  If you live in the DC area, Wagshall’s is the best around.

Duck Confit

4 duck legs including the thighs (skin off is optional but so much better – reserve the skin to make duck cracklings*)

8 medium shallots

16 cloves of garlic

4 cups of duck fat

Kosher Salt – yes I am being very specific because large grain sea salt will not work properly; kosher salt has the perfect texture.

Freshly Cracked Pepper

Two strips of thick cut bacon


Lay your duck legs on a large slice of aluminum foil and coat each side liberally with Kosher Salt and Freshly Cracked Pepper**.  Slice two shallots on your mandoline (seriously, you don’t have one of those yet?) and separate the rings by hand placing them on each side of the duck legs.  Smash and dice six cloves of garlic.  Sprinkle the legs with on all sides with the garlic bits.  Arrange the duck legs as closely as they’ll go and wrap the foil around them as tightly as possible.  Refrigerate for at least 24hours but preferably 36.

When ready to cook, melt the duck fat in a sauce pan over a low flame – if you cannot find duck fat, you can use a vegetable oil.  The purists might protest this substitution, but I have made it both ways at the same time for a taste test.  While the duck fat is better, the oil confit is pretty damn tasty too.

Slice and separate the remaining shallots on the mandoline and set aside.  Smash – but do not dice – the remaining cloves of garlic, and set aside.

Remove the duck legs from the refrigerator and brush off the salt and pepper.  A bit of it will still stick to the meat and that is as intended.  Arrange the duck legs closely together, but not touching, in a Pyrex pan.

Pour the melted fat over the duck which must be fully covered for proper cooking.  If using oil rather than fat, heat the oil over a low flame until warm but well below the flash point.  If you have a candy/fry thermometer, use it to get the oil to about 200 degrees.

In one corner of the pan, add the smashed garlic; place the shallots in the opposite corner.  Think little piles of each.  They are intended to flavor the fat/oil and become a dish unto themselves.

Cut the bacon strips in half and place the four pieces them in the fat/oil.  Put the dish in an oven that has been pre-heated to 225 degrees.  Cook for three hours.

Using a slotted spoon remove the garlic and drain any excess.  Remove the shallots and drain excess.  The garlic and shallot confits can be used as a garnish, refrigerated for another time, or my favorite use, spread on toasted baguettes and served as a canapé.  Yes this part is optional but you might as well.

Remove the duck and let it drain/cool just bit before serving.  By the by, this is nearly impossible to over cook which is among the reasons it works so well as a main course for a dinner party.  You should also save the old fat/oil because it can be reused many times over.

I love serving this with Potatoes Escoffier, or the Truffled French Fries from this dish.


* a recipe for another day

** this is a really good reason to have a spice mill or coffee grinder dedicated exclusively to grinding pepper.
 

Lomo Saltado

Posted in beef, entrée, french fries, tomatoes, upscale peasant with tags , , , on 9 November 2009 by restaurant refugee

I’ve written previously about my affinity for elevated peasant food.  There is no dish that typifies that more than Lomo Saltado, a traditional Peruvian dish of steak, vegetables, and French fries typically served over white rice.  My take on this dish internationalizes it a bit by marinating the steak in soy sauce and Bordeaux, and serving it over orzo rather than white rice.  The staples are the same.

1 skirt steak

1 large potato

2 medium rip tomatoes

1 serano pepper

1 can of black beans

5 cremini mushrooms

8 peeled cloves of garlic

1 medium ripe tomato

2 medium shallots

1 package of orzo

1 bottle of soy sauce

1 bottle of inexpensive Bordeaux

Canola oil, or another oil with a high flash point

Freshly ground pepper

Using your chefs knife, smash four clove of garlic and give them a rough chop.  Dice one of the shallots and place them in a dish with the garlic and the skirt steak.  Add enough soy sauce and wine, in equal measure, to cover the steak.  Rub the steak vigorously and liberally with freshly cracked perpper before marinating it.  Allow the meat to marinade for at least one hour but preferably two to three hours.

Cook the orzo to within a measure of al dente – there will be another cooking cycle that will finish it.

Cut the potato into French fries of your preferred thickness – I prefer a medium width just a touch larger than McDonald’s fries.  Soak them in water for an hour or so.  Rinse the black beans. Slice the shallots, mushrooms, and cerano pepper, and the remaining cloves of garlic.

Near the end of the marinade cycle, heat the oil to just before the flash point.  Don’t forget to salt the oil.  Place half of the French fries in the oil (placing them all in at once would lower the temperature of the oil too much and prevent the crisping of the potato.) Drain the fries and place them in a large covered sauté pan.  Fry the remainder of the potatoes.  Drain them and place in the sauté pan.

Drain most of the remaining oil so that there is just enough to cover the bottom of the pan.  Add the garlic to that pan and cook until softened, add the peppers, mushrooms, shallots, black beans and tomatoes in that order, adding each ingredient when the last is almost cooked. Drain them all to remove any excess oil from the vegetables.  Sauté the black beans and add them to the

There should be just enough oil left in the pan to cook the steak.  Cook the steak for ninety seconds on one side and turn it.  Immediately upon flipping the steak place the pan in a 365 degree oven for five minutes.  Let the steak rest for five minutes before slicing diagonally across the grain.

While the steak is cooking, add the orzo to the sauté pan and heat over medium heat with a pat of butter until all ingredients are equally dispersed and hot.

Deglaze the pan with a cup of wine, add a pat of butter and a heavy splash of cream.  Whisk the mixture until smooth and pour over the orzo-vegetable mixture.  Sauté it until evenly coated.

Serve in bowls and top with pieces of the sliced steak.

Roasted Tomato Bisque with a Gorgonzola & Prosciutto Crostini

Posted in bisque, crostini, prosciutto, Soups, tomatoes, Vegatables on 14 October 2009 by restaurant refugee

It was supposed to be a Fall Friday dinner – hearty foods, rich and lush flavors – but Mother Nature decided not to fully cooperate.  Temperatures spiked into the 80s but I had already decided that “Tomato Soup & Grilled Cheese” was on the menu.

The dish is listed in quotes because it is a playful take on the children’s classic (which is something that I love when I’m sick – in case any of you ever need to know.)  This Roasted Tomato Bisque with a Gorgonzola & Prosciutto Crostini is a low and slow dish that can be made faster – I am listing the “fast” way because that is the one I use most frequently.

Roasted Tomato Bisque with a Gorgonzola & Prosciutto Crostini – Serves Six

  • 30 ounces of tomato sauce
  • 1 pint of cognac
  • 2 medium shallots
  • 6 cloves of garlic
  • 4 ounces of freshly grated parmesan
  • 1 cup of half and half
  • 1 cup of dry white wine
  • 12 leaves fresh basil
  • 2 sticks of butter
  • 6 tablespoons of flour
  • Kosher salt
  • Freshly ground black pepper
  • 3 ounces Prosciutto di Parma
  • 1 country-style baguette
  • 3 ounces of Gorgonzola

Thinly slice the shallots and set them aside.  Chop the garlic and set aside.  Cover both with a damp paper towel.

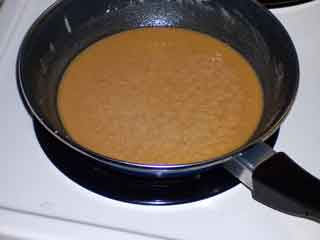
In a stock pot, melt one stick of butter over low-medium heat.  When mostly melted, add the flour to the pot and whisk until blended.  Add a sprinkle of salt and lower the heat.  Stir frequently.  The mixture, also known as a Roux, will require near constant attention – stir several times per minute – and will get progressively more brown.  roux-tan-This picture* is pretty close to the color you want.  It will take about 30-45 minutes to achieve this color.
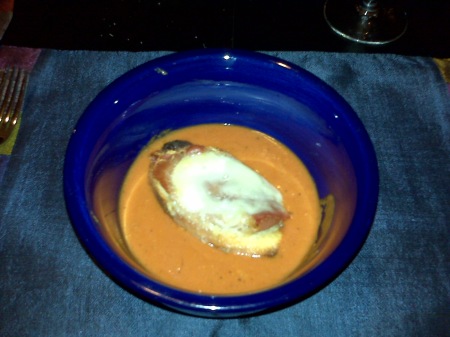
If you have a Sous Chef in the kitchen, turn over the final fifteen minutes of stirring of the roux to him/her while you melt some butter in sauté pan and add the garlic.  Let it simmer for a few minutes and add the shallots and a sprinkle of salt and pepper.  Once the roux is almost at the right color, add a half a pint of cognac to the sauté pan.  Strike a match (or tilt your pan if you’ve got a gas stove) to burn the alcohol away leaving just the flavor of the cognac.  While this fire looks really cool in the kitchen, stop showing off and blow it out already.  Add it directly into the roux, stir once, remove from heat and cover.

In the same sauté pan add a pat of butter and melt over medium heat.  Slice the basil into strips and add to the pan.  Let simmer for a couple of minutes and add most of the rest of the cognac and repeat the trick with the fire.  Add to the roux pot.

Pour in the tomato sauce, the cream, one teaspoon of salt, one teaspoon black pepper.  Raise the heat to medium-low while stirring frequently.  Just before it reaches the bubble point stir in the parmesan – adding the cheese slowly while whisking briskly.  Once all of the cheese has been incorporated, add in the white wine.  Reduce the heat to the lowest setting and let it simmer.   Taste again – you have been tasting while cooking right? – and add salt and pepper to taste.

If you want an extra smooth consistency, then either run your immersion blender through the bisque or let the bisque cool completely and run it through a blender.  The pureeing is an overrated step, but that is a personal choice.

Slice the baguette on the bias – you want the Crostini to be at least five inches long and one third an inch thick.  Brush them with olive oil, place on a baking pan and into an oven preheated to 375 degrees.  Let them toast for five minutes.  Remove them from the oven and reset the oven to a low broil.  Layer prosciutto atop each piece, and then top the meat with Gorgonzola and return to the oven. Make sure that the oven rack is placed in the middle of the oven and not too close to the broiler. Broil until the cheese is melted – about five minutes.

bisqueServe with the Crostini on the side of the bowl or directly in the soup as I did and enjoy.
* this picture is not from my cooking but grabbed from somewhere on the interwebs; unfortunately I neglected to save the link.

Sunday Dinner Parts III & IV – Apple & Pear Dumplings

Posted in apples, dessert, pears on 12 October 2009 by restaurant refugee

The big lessons from the third course of the Sunday dinner I have been chronicling are related to instincts.  Not following my instincts led me to over-cook a lovely beef tenderloin.  I hewed to instructions from another party rather than what I knew to be true.  Besides my error, I also assume that everyone reading this has a solid recipe for grilling a tenderloin and lobster too.  IMG00034

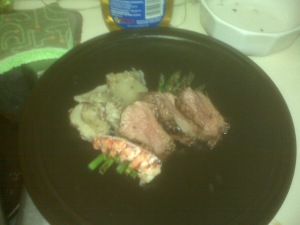
So here is a picture of the least over cooked plate – Surf & Turf: Grilled Beef Tenderloin, Lobster Tails, Asparagus, and Garlic Smashed Potatoes.

Now let’s jump to the Sweet Course.

I normally favor cheese versus confections but this is Fall and apples and pears should not be ignored.  These Dumplings are rather easy, can be made several hours in advance of final cooking, fry quickly, and there was an implied promise DC Striving that I would post this recipe.  This is my kind of dessert.

Apple & Pear Dumplings with Warm Caramel Sauce

  • One medium Apple (I used a Golden Delicious, but any in season apple that bakes well will do)
  • One Ripe Pear
  • Two Tablespoons of Honey
  • One teaspoon of fresh ground cinnamon
  • 1 pinch of Corn Starch
  • Sugar
  • Powdered Sugar
  • One Egg
  • Wonton Wrappers
  • Caramel Sauce (There is a very helpful recipe here, but I place caramel sauce on the list of things that make more sense to purchase than make and I purchase the one from Whole Foods)

Peel and core the apple and the pear.  Brunoise the fruit – the extra small dice allows the dumplings to cook faster.  Heat a pat of unsalted butter in a large sauté pan, add the apples and pears.  Pour the honey over the fruit, add one teaspoon of the cinnamon.  Toss until evenly coated and taste.  That’s enough cinnamon for me but some may wish to have even more.  Stir in a pinch or two of corn starch (it will act as adhesive and absorb excess moisture) and set the mixture aside to cool.

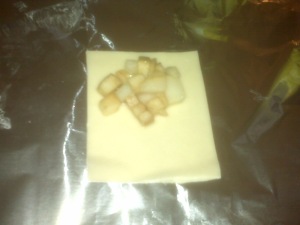
IMG00029Once the fruit mixture has cooled to room temperature or thereabouts, beat the egg in a bowl.  Using two spoons, fill each wonton and seal with the egg wash.  Using the back of a fork to further seal them isn’t a bad idea either.  Sprinkle them with a sugar and let them sit at least thirty minutes at room temperature.  If making dumplings well in advance of frying them, refrigerate them after the initial thirty minutes room temperature period.  Remove them from the refrigerator at least twenty minutes before frying.

Heat fresh vegetable oil in a frying pan to 350 degrees.  Once hot place the dumplings in the oil until golden brown on each side – about two minutes per side.  Place on a paper towel to drain excess oil.  Using a strainer, top with powdered sugar and serve with the caramel in a bowl (get’s pleasantly but not dangerously hot with 30 seconds in the microwave.)

IMG00035

Sunday Dinner Part II – Tagliatelle with Pork Ragu & Tomato Cream Sauce

Posted in pasta, pork, slow cooking on 5 October 2009 by restaurant refugee

Tagliatelle with Pork Ragu & Tomato Cream Sauce

The first time I had a tomato cream sauce was more years ago than I care to recall while I was doing a three month stint in Boca Raton, Florida.  I worked 90 hour weeks, had a barely-existent social life, and generally hated my time down there.  Among the few highlights were a bartender who was particularly nice to me, and a semi-regular lunch at a little café a few blocks from my office.  At least once a week, I would watch an incredible sauté cook produce pasta after pasta in a postage stamp sized kitchen.  My favorite was the Linguini Beanie, the signature dish of Beanie’s Café.  It was sautéed veggies with a simple tomato cream sauce.

Since that summer I have made countless versions of that dish.  This recipe bears almost no resemblance to the initial but it is very much the product of those brief lunches watching the kitchen.  It continues to evolve and I may never stop making this pasta because it brings me so much joy and still reminds me of the sliver of light it brought to very dark times.  I show my love through food and this dish shows more than most.  It was a natural choice for the second course for Sunday dinner.

Tagliatelle with Pork Ragu & Tomato Cream Sauce

Serves 4-5 entrée sized portions or 6-8 midcourse portions.

1 pound ground pork – 80/20 is preferred but any with a fat content greater than 10% will work

10 cloves of garlic

1 dozen fresh basil leaves

1 shallot thinly sliced – have you purchased a mandoline yet?

1 tablespoon fresh oregano

½ cup of sherry

¼ cup of olive oil

30 ounces of tomato sauce

½ cup of half and half

6 ounces of Parmigianino Reggiano cheese

1 pound of Tagliatelle

1 stick of salted butter

Kosher Salt to taste

Fresh Pepper to taste

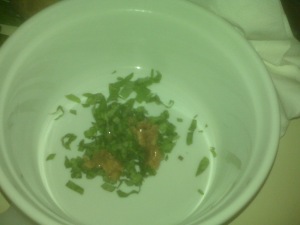
I used a slow cooker to make this dish but you can also do this in any pot that conducts heat well if you have a burner with a consistent and low flame.  Start the slow cooker on low and add the olive oil. Smash the garlic cloves with a knife Pork Ragu 1or other implement and add to the oil.  Roll the basil leaves into a finger and slice into ½ inch strips and add to the oil.  Add the oregano and a sprinkle of salt to the oil.  Let it cook for about 30 minutes while the meat comes to room temperature.  Failing to cook meat at room temperature is among the most frequent mistake people make with food.
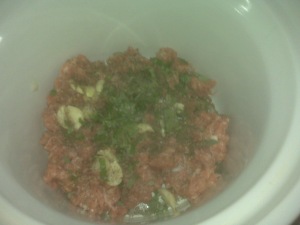
Once the garlic and other spices has had a chance to soften and get to know each other, add the sherry and the ground pork.  You will need Pork Ragu 2to use a wooden spoon to separate the meat but wait just a minute until everything has come back to temperature.  Stir the meat around until it has the ground meat texture.  It will take about an hour to mostly brown and cook.
After the meat is mostly cooked, add the tomato sauce and the half&half.  Add a healthy sprinkle of salt and pepper and let cook for another hour.

The sauce now needs to be transferred to a stock pot and the temperature brought to a low boil.  Grate in the parmesan cheese but leave enough cheese to finish the bowls tableside.  Once the cheese is incorporated, lower the heat and return to the slow cooker.  Place the slow cooker on the Low setting for another 30 minutes.

The sauce is done at this point and the slow cooker setting should be set to warm until serving.

None of you need me to explain how to make al dente pasta or serve from this point, right?  OK, good, let’s move along.

A couple of things to note about this dish:

  • There are a few things that are on my Not Worth the Effort to Make from Scratch List, and unless you’re expert chef with an hankering to make your own pasta, Tagliatelle is on that list.  I am in love with the pasta from Severino.
  • Also on the aforementioned list is Tomato Sauce.
  • I am really sorry that I forgot to take a picture of the final product.
  • This dish can be condensed into a 30 minute cooking time by not using a slow cooker and doing all of the steps at higher heat.  It will still taste good but not nearly as good.
  • One really good time saver is to swap the ground pork with oven roasted sausage.

Sunday Dinner Part I – Avocado & Tomato Salad with Crispy Pancetta

Posted in apples, Avocado, pancetta, salad, salads, tomatoes on 23 September 2009 by restaurant refugee

Sunday Funday is a blast that usually begins with brunch and continues late into the afternoon and often early into the evening.  It usually crowds out one of my other cherished Sabbath rituals: Sunday Dinner.  This most recent Sunday allowed the opportunity to gather a few friends for supper, conversation, some wine, and a little football.  I had only a rough idea what I was planning to serve and decided that I would allow the available ingredients and relative quality dictate the menu.

This plan violated one of my cardinal rules of cooking – I didn’t have a plan.  I did, however, have a ride which made things a good deal easier, and thus proceeded on the schedule of the person driving.  I spun my wheels around the protein sections of Harris Teeter a good three times, and spent at least as much time in the produce area.  Eventually, a plan started to take shape: salad course, pasta, Surf & Turf (lobster was on a deep sale,) and sweet courses.  The salad that I made was as much about blending of textures as it was flavors.

********

Avocado & Tomato Salad with Crispy Pancetta

Serves Six

One Pint of Grape Tomatoes

One ripe Avocado

Two ¼ – 1/3 inch thick slices of Pancetta

One Tablespoon Garlic Infused Olive Oil

Two Teaspoons Aged Balsamic

¼ Cup Diced Spring Onions

One “Finger” of Basil Leaves

One Tablespoon of Shallot Confit

Sea Salt to taste

Fresh Pepper to Taste

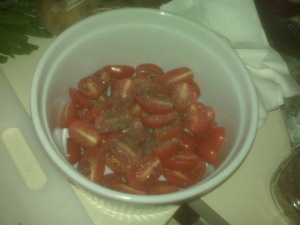
IMG00032Halve the grape tomatoes and place in a salad bowl.  Roll several fresh basil leaves into a cylinder about the size of your pinkie finger and slice into thin strips; add to the bowl.  Dice the spring onions and add to the bowl.
The Shallot Confit was something that I had sitting in my refrigerator; it was a byproduct of making some infused shallot oil that I gave to a couple of friends for housewarming and host gifts.  It adds terrific flavor and texture but don’t let it be an impediment to making this dish.  I will write about the instructions for the shallot confit/infused oil soon, but in between time feel free to use some shallots caramelized in butter.  Add them to the salad bowl.

The garlic infused olive oil is also a nice to have and something that I recently made for myself and friends.  In lieu of the flavored olive oil, use extra virgin and add two pinches of garlic powder to the mix.  Add the balsamic to the bowl.  While tossing all the ingredients add the salt and pepper and continue to toss until all ingredients are evenly coated.

Grill the pancetta slices (only if you’re doing something else on the grill or have an indoor grill pan, if not grilling, then cook in a non-stick pan with just a touch of butter) for three minutes on each side.  Once the pancetta has been cooked, halve the avocados and slice them into strips (actually the next time I make this dish I will probably slice straight across the halves such that there will be a whole pear shaped slice of avocado; this will increase the number of avocados required to two; but will make the dishes prettier.) Lay two strips across each plate.

Dice the pancetta and add to the salad while it is still relatively hot but not so hot that it will cook other ingredients.  Toss the salad again and scoop onto the avocado slices.

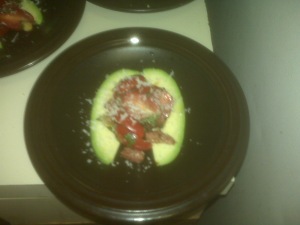
IMG00033The result is an exercise in creamy, salty, chewy, acidic and fatty balance.  I decided to grate some parmesan atop before serving, but upon tasting it, I don’t think it adds enough to merit inclusion.
********

The rest of the meal was:

Slow Cooked Pork Ragu with a Tomato Cream Sauce of Tagliatelle Pasta – Friday Post, hopefully

Grilled Lobster Tails & Petite Beef Tenderloin in Peppercorn Marinade with “Smashed” Potatoes and Grilled Asparagus

Petite Apple & Pear Turnovers with hot Caramel dipping sauce – Monday Post

The Essentials

Posted in the rules on 9 September 2009 by restaurant refugee

The Essentials

Jamie, the author of the My Life with Redheads Blog, is about to build a new house and is in the process of making some decisions about her kitchen.  She recently asked me for “suggestions on what a passionate cook cannot live without?” This is the first installment (assuming that more come to mind) of what I consider essentials for the kitchen and cooking.

  1. A good knife set is essential to all precision cooking and most attractive plating.  It is a worthwhile investment that will yield years long, if not life long, dividends.  That being said:
    1. The most important knives are your Chef’s knife, a carving knife, and a pairing knife – in that order.
    2. Investing more than $250 in knives is wasted money for all but the most serious of home cooks.
    3. Purchasing an inexpensive knife set and splurging on the chef’s knife is the most practical way to proceed.
  2. A slow cooker might provide the most culinary bang for the buck around.
  3. Rivaling the slow cooker for the most bang for the culinary buck is the mandoline.
  4. The immersion blender is solidly in third place – especially the 10 speed 300 watt model that is currently making my socks roll up and down.
  5. I would rather invest my money in a double oven and a six burner stove than any other major kitchen appliances.
  6. Warming trays are nice to have but will not be used that frequently.
  7. When designing, or evaluating a kitchen, besides the aforementioned stove issues, the usability and ease of access to storage, and counter space are the most important factors.
  8. Towards that end, there are few design elements more valuable than a center island.
  9. Never underestimate the universal functionality of a microwave.
  10. Whatever can be hung from a ceiling or mounted on a wall should be.
  11. For more specific design instructions, I found this website to be very accurate and helpful.
  12. The hanger steak is the most flavorful cut of beef around – especially when you consider that it costs $10/pound at WholeFoods versus the Tenderloin which sets you back $25/pound.
  13. Just as two will always shorten whatever road you travel; two will always shorten the cooking time of any dish.
  14. Cooking without music and wine is like swimming without water.
  15. Only the lazy cook makes throw-away salads.
  16. Margarine and butter are not interchangeable no matter what anyone tells you.
  17. Cast iron and Copper pots have no peers.
  18. Attempting to recreate restaurant dishes is somewhat akin to comparing yourself to the models on the magazine covers… which is not to suggest that it shouldn’t be attempted.
  19. I cook for the soul, the palate, and the eye – in that order… not saying that you should too, but I doubt it could ever hurt.

Braised Beef Short Ribs with Truffled French Fries

Posted in beef, entrée, french fries, short ribs, truffle oil, upscale peasant on 2 September 2009 by restaurant refugee

Braised Beef Short Ribs with Truffled French Fries

I frequently get asked what style of food is my favorite/specialty/whatever.  I am not a fan of answering that question or any favorite question as I find it too general and lacking in context.  If forced, however, I won’t name any country or region, I won’t discuss molecular gastronomy, or culinary towers in tribute to my ego.  I will say that Highly Elevated Peasant Food Executed with Great Care and Sophistication is my specialty.  I love the dish that pays homage to the classic and the homey while still being worthy of fine dining placement.  My Lamb Ragu Pappardelle and Tomato Cream Sauce isn’t exactly like the northern Italian dish that mothers have made for centuries but I’ve proudly served it to some of the most educated palates on my client list and done so to rave reviews.

This Beef Short Rib dish is also a terrific example of my “favorite” style of food.  I could eat this every day for a week and never tire of it, so it was a natural for dinner last Sunday with some friends – and sadly this was the only course I forgot to photograph.

**************************

3 tablespoons of canola or other vegetable oil

4-5 pounds of bone-in short ribs

1 large red onion thinly sliced (run through a mandoline is preferable)

2 carrots sliced

4 cloves of garlic roughly chopped

2 shallots thinly sliced

1 finger of thyme

2 cups of flour

3 tablespoons of kosher salt

3 tablespoons of freshly ground black pepper

1 bottle of dry red wine (I prefer to use a ½ a bottle of Syrah and ½ a bottle of Pinot Noir)

1 cup of Sherry

1 cup of beef stock

3 medium to large baking potatoes

2 teaspoons white truffle oil

Salt and Pepper to taste

2 quarts of Peanut Oil

**************************

Heat the canola oil over medium to medium-high heat, and preheat the oven to 360 degrees.  In a mixing bowl, blend the flour, salt and pepper.  Coat each of the short ribs with the flour mixture and dust away excess.  Brown each piece of meat on all sides until a crust has formed.  Place all of the meat in a Dutch Oven and cover.

Reduce the heat in the pan to medium-low and deglaze the pan with wine.  Add the shallots, garlic, thyme, and onions to the pan.  Cook them until the shallots are translucent (the garlic will be just a touch browned at this point.)  Add the remaining wine to the mixture and reduce the heat to low.  At the simmer point, pour the mixture into the Dutch Oven, add the carrots, cover and place in the oven.  Cook for two and a half to three hours.  Remove the meat, setting aside the bones*, and place in another dish and cover.  Strain the braising liquid into a sauce pan (feel free to spoon some of the onions and shallots from the strainer into the sauce pan and puree with an immersion blender.) Over a low flame add a pat of butter and splash of whipping cream, and stir until slightly thickened.

Julienne** the potatoes and soak in water for at least one hour.  In a large deep pot heat peanut oil*** to 300 degrees (you should have a candy/deep fry thermometer for this) or over medium low heat until a drop of water will “pop.”  Dry the potatoes well and place them in the oil (in batches) until tender (about three minutes) and remove and place on paper towels to drain oil.  Turn the oil up to 360 degrees or medium-medium-high.  Return the fries to the oil until nicely crisped (about two minutes) and remove them for draining.  Place them in a mixing bowl and toss with Truffle Oil, a generous sprinkling of kosher salt, and a dusting of pepper.  Grate fresh parmesan cheese over the fries to serve.

Serve the short ribs and fries on one plate and sauce**** the meat after plating.

**************************

* Use the bones to make the stock you’ll need for the next time you make this or any dish requiring beef stock.

** So much easier to do this with a Mandoline – I highly recommend this one for 95% of home cooks.

*** You may not need all of the peanut oil, it will depend on the shape and depth of the pot.  You want to have a depth of at least four inches.

**** You will not use all of the sauce, but it is way too good to toss.  Freeze it because it is way too good to waste.

Sea Scallop Ceviché with Butter Lettuce and Grapefruit Salad

Posted in ceviché, salads, scallops on 1 September 2009 by restaurant refugee

“I just got back from the farmers market and got some butter lettuce, and some peaches and peppers.  Wanna cook tonight?”

My very dear friend, the Only Slightly Sleazy Lobbyist, lives five minutes from one of the best farmers markets in the city but this was his first visit.  His tone reflected that excitement.

“Sure, this is a gorgeous day why the hell not.”

Summer nights require bright, clean flavors and this salad is exactly that, and I even remembered to take pictures… with my Crackberry, but pictures nonetheless.

Sea Scallop Ceviché with Butter Lettuce and Grapefruit Salad

(serves six)

Six Sea Scallops

Two Limes

One Lemon

Salt

Pepper

One Head of Butter Lettuce (also known as Bibb lettuce)

Chopped Scallions

¼ cup of chopped red onions

One Grapefruit, segmented

Two Strips of Thick Cut Bacon

Extra Virgin Olive Oil

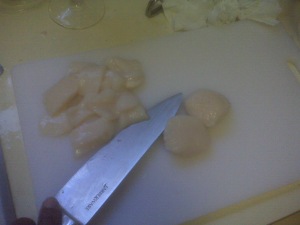
Sliced ScallopsSlice the scallops into 1/8th inch thick strips and place in a bowl.  Juice lemons over the scallops until it is well covered.  Add a teaspoon of salt and a teaspoon of pepper to the scallops and stir until well mixed.  Let stand for sixty minutes.  The acid from the limes and the lemons will cook the scallops.
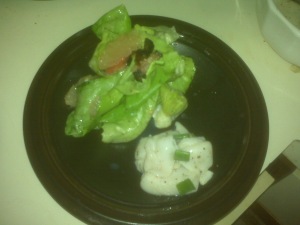
Cut the lettuce into manageable sizes and place into a salad bowl.  Segment the grapefruit and add to the bowl (nifty instructional video here.)  Add the chopped onions to the mix.  Cook the bacon until the fat is fully rendered.  Dice the bacon and add to the mix – pouring a touch of the bacon grease into the mix would not be a bad idea but is completely optional as is the inclusion of bacon itself.  Drizzle a bit of olive oil, sprinkle salt and pepper and mix well.

Drain the juice, add the scallions, and a touch of large grain sea salt for added texture.

I would have preferred to have served this molded into a one inch round but I left the rings at home, so I served a small mound of salad next to a slightly smaller mound of the scallops.

IMG00022

Tuna Tartare Canapés

Posted in canapés, tuna on 25 August 2009 by restaurant refugee

Because Tuna Tartar became too en vogue in the late 90s, some people have, understandably, tired of the dish.  I am not among them.  Sushi grade tuna should be simply dressed and enjoyed in elegant forms.  This variation makes very sophisticated but playful canapés for any dinner party.

************

¾ pound sushi grade tuna

Wasabi powder

Good soy sauce (once you taste good soy sauce, you’ll never use Kikkoman again)

Scallions

Avocado

Poblano Pepper

Large grain Sea Salt

Pepper

Extra Virgin Olive Oil

Tostitos Scoops

************

Having a very sharp knife is important for the preparation of the tuna.  There is a thin piece of conjunctive tissue between the main tuna loin and the tenderloin.  You will need to cut around that, but it should not waste too much of the tuna.  Dice the tuna into cubes about the size of playing dice and place into a medium mixing bowl.  Dice the pepper into pieces with about as much surface area as confetti – the goal is to add a bit of crunch with just a touch of heat.  Add two teaspoons of the pepper to the tuna.  Thinly slice the scallions and add two tablespoons to the tuna.  The avocado should be cubed but smaller than the tuna, add two tablespoons and use the rest to make some guacamole (recipe coming tomorrow – or sometime soon.)  Add one teaspoon of fresh pepper and a quick drizzle of Olive Oil.

In a separate bowl blend three tablespoons of soy sauce with one teaspoon of wasabi powder (these measurements are very subjective – some like it hot – but be careful not to obscure the tuna.)  Pour about half of this mixture over the tuna and other ingredients and stir until all ingredients are well blended and evenly coated.  Taste and make adjustments.  Be sure to use the tortilla scoops to taste this mixture as they have a fair bit of salt and that needs to be a factor before you add any of the sea salt.  Adjust with more of the soy sauce mixture and sea salt and then spoon into the tortilla scoops to serve.

This will make 25-30 individual cups.  Unless you anticipate that they will all be consumed in short order, do the final prep in stages so that the tortillas stay crispy.

************

This recipe can be easily adapted into an appetizer about which I will write in the near future.